Hey everyone. It’s been a while.
I don’t have a dramatic explanation for the gap. A combination of burnout, other projects pulling my attention, and — honestly — just needing the break. The last behind-the-scenes post covers most of it, and I won’t belabor the point.
What I do want to talk about is what I came back to, because if you’ve been reading this blog to learn Fabric modding, a lot has changed, and anyone picking up my tutorials today needs to know what they’re walking into.
The short version
While I was away, Minecraft and Fabric went through what’s probably the biggest inflection point in the modding ecosystem’s history. Three things happened:
- Mojang removed obfuscation from Minecraft. Starting with the version after 1.21.11, the game ships with real, readable class and method names. This is a massive quality-of-life improvement for modders, but it also means the entire toolchain that existed to deal with obfuscation has to change.
- Yarn is being retired. The community-maintained mapping project that I used throughout every tutorial on this blog — and that thousands of Fabric mods rely on — is no longer being updated past 1.21.11. The official path forward is Mojang’s own mappings (Mojmap).
- Minecraft’s versioning changed. The version after 1.21.11 is not 1.22 — it’s 26.1. Mojang is moving to a year-based versioning scheme. So future versions will look like 26.2, 26.3, 27.1, and so on.
On top of that, Fabric’s own API got a significant update to match: recipe serializers were simplified, ItemStack creation rules changed, new event systems were added, and plenty of class names changed to match Mojang’s.
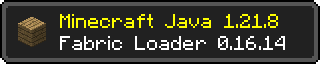
If you were following my tutorials and built the bubble gum mod alongside me, your code still works — for 1.21.8. Every post on this blog is stamped with the version it targets, and that hasn’t moved. But picking up a 1.21.8 tutorial and trying to apply it directly to 26.1 will not go smoothly.
What this means for the blog
I’ve been thinking about this for a few weeks and I’ve landed on something that feels right:
Old posts stay up, untouched. Every tutorial I’ve written so far targets 1.21.8 with Yarn mappings, and those posts aren’t going anywhere. If you’re learning Fabric modding on that version, they still work exactly the same. I’ll be adding a small banner to each of them linking to the updated version once one exists.
New copies of each post will target 26.1 and Mojmap. Rather than edit the originals, I’m duplicating each one and updating the copy. The scope is deliberately minimal — swap out the specific APIs that changed, update names to match Mojang’s mappings, fix code that won’t compile, verify it works. I’m not rewriting explanations or restructuring. If a post taught you how to add a food component in 1.21.8, the new version teaches you the same thing for 26.1, just with current code.
This means the blog will end up with two parallel series for a while: the original 1.21.8 posts as a time-capsule, and the 26.1 versions as the living tutorials. Both stay accessible. Over time the 26.1 versions will become the canonical ones, and the old posts will remain as archive.
I’m not committing to a schedule for the ports. Some posts will change barely at all; others (recipes especially, with the serializer simplification) need real work. They’ll get done when they get done.
New content going forward targets 26.1 directly. Anything written from scratch will be on the new toolchain from day one.
What I’m actually working on
For anyone curious what pulled me away — I’ve been building something completely different: a Minecraft mod that generates an approximation of real Earth using public elevation data. Map projections, icosahedral geometry, DEM sampling, the works. It’s given me a reason to re-engage with Fabric from a much more advanced angle than the beginner tutorials covered, and I expect the next real post here will be about something I learned from it.
Custom world generation is one of the less-well-documented corners of Fabric modding, so there’s actually something worth writing about there. Good timing.
So, welcome back
If you’re new here, the older posts teach you how to make your first Fabric mod on 1.21.8. They’re still a valid starting point. If you’re returning — thanks for your patience. Things are still moving, just slower and in a different direction.
Next post will be about Fabric 26.1 development setup. See you then.